Get Started!
MaterialsYou will need the following materials before you start your friendship bracelet:
1. Floss: you can buy floss from most fabric and craft stores.
2. Beads (optional): you can buy beads from most fabric and craft stores. 3. Scissors 4. Clip or clipboard The basic Candy Striped Friendship BraceletStart out with the easiest friendship braceletWhat you will need:
Cut 4 strands of floss (4 different colors), each 25 inches long (63 cm). Instructions: 1. Put all of the strands together and tie a knot about 1-1.5 inches (4 cm) from the top. 2. Clip the top (above the knot) onto a clipboard or somewhere to hold it steady. 3. Seperate the strands so that there is space in between them. 4. Start with string 1 and loop it over and then under string 2, making a knot. Hold string 2 tight while doing this and pull the knot tight. 5. Do step 4. a second time, making a double knot. 6. Now, take string 1 and make double knots around each of the remaining strands, left to right. 7. Now, do the same thing again, starting with the far left strand and tie double knots, left to right, all the way across all the other colors. 8. Keep going until the bracelet is as long as you want it. 9. To end the bracelet, gather all the strings and tie a knot to secure it. Trim the ends to about 1-1.5 inches (4 cm). This makes a narrow bracelet. You can add more strands (6-8 strands) to make it wider. 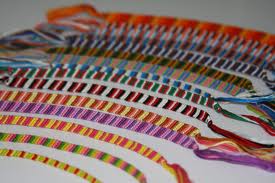 |
||
"The Wrap" This is also one of the easiest patterns. It's very simple and a good way to start off. Items Needed
Instructions
|
Here is what the wrap will look like when you're done. 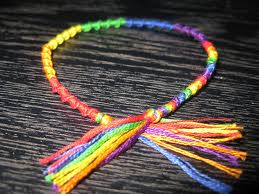 |
|
This free website was made using Yola.
No HTML skills required. Build your website in minutes.
Go to www.yola.com and sign up today!
Make a free website with Yola
